Eco-Friendly Lava Rock Bath Bombs
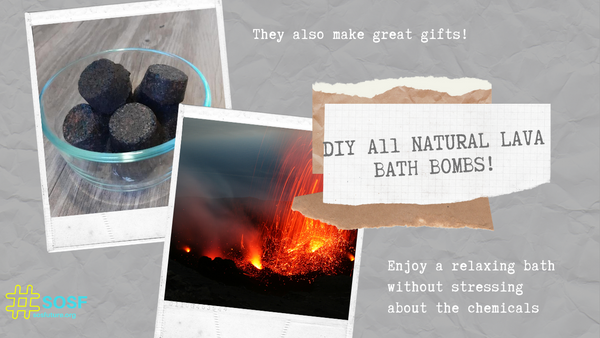
We love self-care and especially items that enhance our self-care time, such as the oh so popular bath bombs. While it may be easy to grab a bath bomb or similar skincare item from a shelf and call it a day, those products often contain chemicals that are not the best for your skin, and even worse for the environment. Not to mention the packing materials that are involved in the process of each beauty product. That is why we just had to share this lava rock bath bomb recipe. These lava rock bath bombs are just one example that self-care and beauty routines do not need to change in order to help the environment. In fact, not only will you be able to enjoy a relaxing bath without stressing about the chemicals in the tub, you will also save money. This bath bomb recipe costs pennies per lava rock and there is no packaging needed. That’s what we call an environmental win-win!
Materials Needed:
1/2 cup epsom salts
½ cup citric acid
¾ cup cornstarch
2 TBSP coconut oil (or oil of choice)
30-40 drops of essential oil
1 TSP water
1 cup baking soda
Food coloring or 2 teaspoons activated charcoal
Mold
2 bowls
Whisk
Steps:
1-We like to start with the most important part for us; selecting the scents. Essential oils are a perfect and natural way to add wonderful smells without the harmful chemical fragrances. We also like to choose the essential oils out first, as their scents can complement the aroma of the carrier oils used in the bath bombs. There are several different types of carrier oils that you can select from. Each carrier oil has its own benefits to your skin. We chose coconut oil for the moisturizing effects. Doing your research on different types of carrier oils and the benefits of other natural oils is a great way to expand your knowledge in the world of natural beauty products. Once you are satisfied with your selection of carrier oil and essential oils, add the correct amounts, and whisk them together.
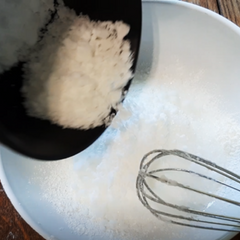 2-Next, add in the 1 cup of baking soda to the oil mixture and stir until it is completely mixed.
3. For the next step you will need a separate bowl. Place the 1/2 cup epsom salts, ½ cup citric acid, ¾ cup cornstarch, and the tsp activated charcoal (if desired) into the bowl. Mix these dry ingredients together.
4. After your dry ingredients are mixed, slowly add them to the mixture of oil and baking soda.
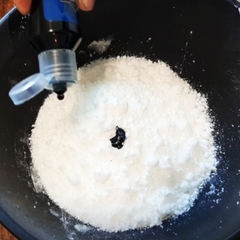 5. If you added charcoal to your mixture prior, you do not need to add any more coloring. However, if you chose to use food coloring instead, now is your time to shine! Add blue and red food coloring drops and mix them into the bath bomb mixture. You may need to add a tiny bit of water to see the actual color better. It is best if this step is done using only a tiny bit of moister at a time. If you add too much moisture to the dry ingredients, it will start to bubble up and waste some of your materials.
6. Take the mold that you are planning on using for the lava rock bath bombs. In this example we used a silicon muffin pan. This item worked well because it was easy to remove the bath bombs due to the silicon’s flexibility. The materials are all natural and did not hurt the cooking tray. You could also use an ice cream tray, muffin pan, or an actual mold for bath bombs (but why buy a new product when another item will work just fine). Once you have your mold, place a small amount of oil on the edges of the mold so that the bath bomb will easily slide out when it is dry.
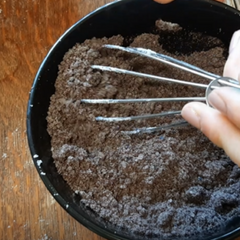 7. Now is when the project gets really messy! Take about two tablespoons worth of the mixture and place it in the molds. We found that this step is easiest when done with your hands. If you have sensitive skin, we recommend wearing reusable gloves to protect your skin during this step. The bath bombs are eventually meant to be diluted in water. Your skin will love the great materials in this recipe, but handing the baking soda and citric acid in full force can irritate the skin.
8. The mixture needs to dry for at least 24 hours. Place the molds in a cool, dry place to dry. If you notice the bath bombs growing, that only means that there is a little too much moisture. Simply press down on the bubbling mixture while it is drying. Compacting the mixture while it is drying will create a tighter, more reactive bath bomb.
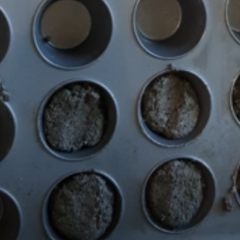 9. After the lava rock bath bombs are completely dry, remove them from the mold. Store them in an air-tight container and use as frequently as you would like!
They also make great gifts!
TO HELP US CONTINUE WITH OUR MISSION YOU CAN:
Thank you, thank you, thank you, we could not do it without you!
DONATE :
BUY ONE OF ECO-FRIENDLY PRODUCTS:
WATCH THE VIDEO:
YOU MAY ALSO LIKE:
DIY HOW TO MAKE A REUSABLE DIFFUSER
DIY ALL NATURAL TOILET BOWL CLEANER
DIY ECO-FRIENDLY LAUNDRY DETERGENT
DIY ECO FRIENDLY DETERGENT
HOW TO MAKE A NO SEW T-SHIRT REUSABLE BAG
10 DIY RECYCLE GIFT BAGS
DIY ECO-FRIENDLY EARRINGS
5 DIY RECYCLED AND ECO FRIENDLY FATHER’S CARD


