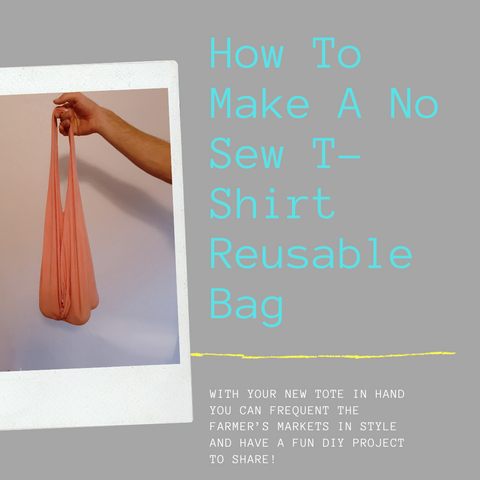
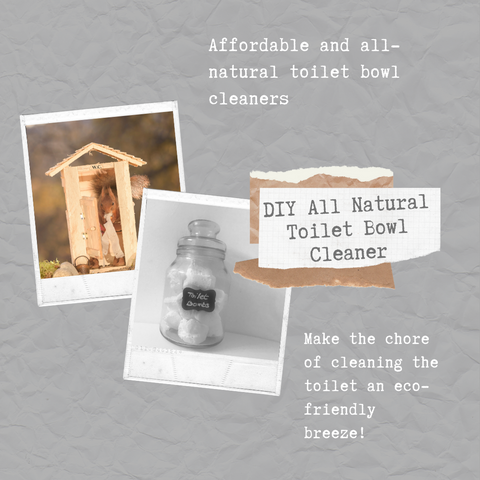
DIY Eco-Friendly Earrings

These earrings are not only super trendy and versatile, they are also eco-friendly and a perfect DIY project. Follow the steps below to make a great gift for any celebration or your own affordable and sustainable jewelry.
Materials Needed:
- Polymer clay
- Rolling pin (you could also use a large plastic tumbler or thick glass bottle)
- Clay cutter or knife
- Pliers
- Super glue
- Baking Sheet
- Earring Hardware of Choice
- Earring posts and backs (gold or silver)
- Wire or large jewelry jump rings
- Wire Needles
- Parchment Paper or a silicone baking sheet (optional)
- Small clay or cookie cutters (optional)
Instructions
Step 1 – Preheat Oven and Prep Baking Tray
Start by preheating your oven to 225 Fahrenheit. It is best for the clay to have an evenly headed oven to bake, so it is important to give your oven time to warm up. Next, line a baking sheep with oven safe parchment paper to prep for later. Be sure your working area is free of lint or crumbs. You’ll be surprised at how much residue the clay can really attract!
Step 2- Prep Your Colors
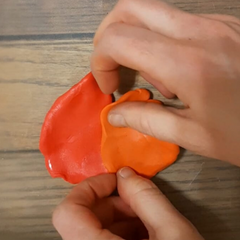 You can buy clay in a vast array of colors and use them as is for your earrings. However, sometimes the look or color you want requires a little mixing. Mixing or kneading the clay will also help activate the clay so it bakes evenly. There are many techniques to use when mixing your clay colors. The most common techniques are listed below.
Marbling Technique
Choose the colors you would like displayed in the marbled clay. Next, roll the clay pieces on
parchment paper to create long, worm shaped strips. Combine the strips into one multi-colored large role. Stretch the role, then fold it over and roll it out again. Keep folding and rolling the clay until you have reached your desired marble look.
Blending
You can create your own custom color of clay by using the same technique as marbling. Start with colors that blend well to create your desired final color. Dark colors will create a big effect in the overall color, so start by adding-in dark colors sparingly. Roll the colors together, then fold over and repeat until all the colors are completely blended.
Contrasting Colors
Choose the colors you would like next to each other. Press the colors together along a crisp edge to seal the contrasting colors. Cut out your desired shapes over where the colors are pressed tightly together.
Go Bold
Bold clay earrings look great! You can create this stand-out look by stacking different colors of clay on each other. The stacked colors will form a large roll of clay which can be cut vertically and flattened more or rolled out to be as thin as needed. This technique creates a unique combination of colors that can be perfect for your specific style.
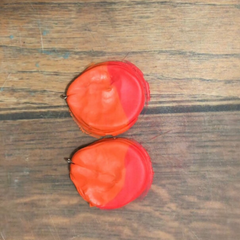
Step 3- roll it out
 Prepare parchment paper on a flat surface. Parchment paper will be easy to remove the clay from when it is baked. Then take the clay roller or plastic tumbler, and smooth out the clay to prepare for it to be cut. You will get to choose the thickness of your earrings during this step.
Step 4- Make the Shapes
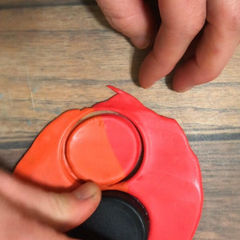 Creating the shapes for your earrings is just another easy way to make them unique to you. There are several different cookie cutter or clay molds you could buy. Another option is to make your own! Paper shapes work to trace over the clay with a and metal wire can also be shaped into whatever mold you would like the clay to be cut into. You might be surprised how nicely a bottle cap works as a clay cutting mold. Let your creativity lead you! In the worst-case scenario you can start over by rolling out the clay to cut it again.
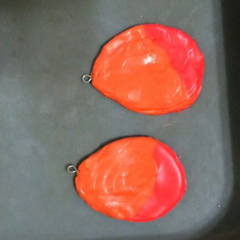
Step 5- Prep with a Poke
 If you plan to connect different pieces of clay together for the earrings, you will need to form hole for jump rings, or wire to connect the pieces together. Once the clay is cut into the desired shape of the earring, use a wire, toothpick, or knife to cut a small hole where the jump ring will go. In this step you, have to plan ahead to know what your final look will be. Once the clay is baked there is no going back to add any additional holes.
Step 6- Heat It Up!
 Once all the shapes are cut and the connecting holes are made, pick up the parchment paper and place it on a baking sheet. You could also use a silicone baking sheet instead of parchment paper. Bake the clay for about 10-12 minutes at 225 Fahrenheit.
Step 7- Cool and Connect
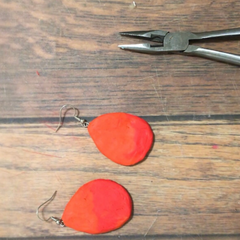 After about 10-12 minutes, take the clay out of the oven and let it cool. The clay should peal right off of the parchment paper once it is cool. When you are sure the clay is completely cooled, use the jump hooks, or wire to connect the clay pieces together. If you are using posts, dab a drop of super glue on the stud earring piece and place the post where you would like it to dry.
Step 8- Optional Accessories
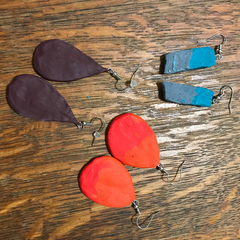 After you have completed your eco-friendly earrings, feel free to add some flare! Accessorize the earrings with additional items like tassels, hoops, or leather pieces. These are your custom creations so have fun and make them your own!
Forget ordering plastic or mass-produced jewelry and follow these steps to create your own custom and sustainable jewelry!
TO HELP US CONTINUE WITH OUR MISSION YOU CAN:
Thank you, thank you, thank you, we could not do it without you!
BUY ONE OF ECO-FRIENDLY PRODUCTS:

DONATE :

Watch the VIDEO: